


How to use React Navigation with Typescript in a React Native project
Learn how to use the stack navigator with typescript

This article is referencing React navigation version 6x.
pre requisite: Basic React, React Native, and typescript skills

In this article, I will teach you how to use React Navigation in a React Native project that utilizes typescript. The focus will be on implementing a Stack Navigator.
Import the necessary packages
In order to get started we need to import the following packages:
react-navigation/native
react-native-safe-area-context
react-native-screens
react-navigation/native-stack
react-native-gesture-handler
react-navigation/native
The first import, react-navigation/native is dependent on react-native-safe-area-context and react-native-screens.
react-navigation/native-stack vs react-navigation/stack
In order to type our screens in the Stack Navigator, we need the react-navigation/native-stack package with the import keyword. We also need this package to create our Stack Navigator. There is an alternative package called react-navigation/stack but the docs suggest using the native-stack for performance reasons as shown below.
One thing to keep in mind is that while @react-navigation/stack is extremely customizable, it's implemented in JavaScript. While it runs animations and gestures using natively, the performance may not be as fast as a native implementation. This may not be an issue for a lot of apps, but if you're experiencing performance issues during navigation, consider using @react-navigation/native-stack instead - which uses native navigation primitives.
react-native-gesture-handler
Per the docs, react-native-gesture-handler is required for our stack navigator and must be placed at the top of your entry file (i.e., App.jsx/tsx ot index.js/ts). I will demonstrate this later in the article.
For more info click the links below:
To set up the core modules for navigation in a React Native app click here!
To set up Stack Navigation in a React Native click here!
To set up proper screen typing of a Screen, click here!
Setting up a Stack Navigator
The Stack Navigator is a core building block when adding navigation in a React Native app. It allows us to move flawlessly between different screens. If you’re not familiar with Stack Navigation, I encourage you to start here!. With that being said, lets import the necessary dependencies we discussed earlier in your favorite editor. I’ll be using VS code.

Let’s discuss each import before moving on.
react-native-gesture-handler - This file is required by the stack navigator. It’s important this package be imported at the top of your entry file(i.e, index.js/ts or app.jsx/tsx)
NavigationContainer-In order for Stack Navigation to work properly, we need to wrap our navigator and screens inside this container.
NativeStackScreenProps - This import allows us to type our screens. I will demonstrate how to implement this later on
createStackNavigator - This object will return the necessary components for building our Stack Navigator and screens. I will demonstrate how to implement this later in the article.
Creating a Stack Navigator with Typescript
Typing Navigators
In order to implement a Stack navigator with Typescript, we need to use the createStackNavigation function which returns the necessary React components.
const Stack = createStackNavigator();Since we’re using typescript, we’ll need to create a type and pass it createStackNavigator as a generic
type RootStackParamList = {
  Home: { post: string };
  Post: undefined;
};

const Stack = createStackNavigator<RootStackParamList>();
This type will tell createStackNavigator two things. First, the Home and Post should be in the same Navigation container. If we try to add a component, say Settings, and it’s not part of our RootStackParamList type, we should get a typescript error. The second advantage of using our custom type is it tells createStackNavigator which params each screen should expect. If you’re not familiar with params, they are objects that a screen will pass to another screen to share data. In other words, if the post screen wanted to pass its post to the home screen, it would need to pass an object with a post property in order to avoid a typescript error. You can learn more about passing params here!
Typing Screens
Next we will discuss how to type each screen in our navigator. According to the docs, we need to use the NativeStackScreenProps we imported earlier and pass it two generics:
1. The param list object we defined earlier (RootStackParamList)
The name of the route the screen belongs to
type RootStackParamList = {
  Home: { post: string };
  Post: undefined;
};

type HomeProps = NativeStackScreenProps<RootStackParamList, "Home">;
type PostProps = NativeStackScreenProps<RootStackParamList, "Post">;

const Home = ({ route }: HomeProps) => {
  return (
    <View style={{ flex: 1, marginTop: 20, alignItems: "center" }}>
      <Text>Post results below 👇🏾</Text>

      <Text>{route.params?.post ?? "No post yet"}</Text>
    </View>
  );
};

const Post = ({ navigation }: PostProps) => {
  const [state, setState] = useState("");

  const handlePost = () => {
    navigation.navigate({
      name: "Home",
      params: { post: state },
      merge: true,
    });
  };
  return (
    <View>
      <TextInput onChangeText={setState} placeholder="message" multiline />
      <Button title="post" onPress={handlePost} />
    </View>
  );
};
By adding PostProps and HomeProps to our screens/components, we can safely use the navigation and route object given to us by React Navigation.
Everything put together
Now we can put our safely typed screen with our typed NavigationContainer as demonstrated below.
//...
const Stack = createNativeStackNavigator<RootStackParamList>();
<NavigationContainer>
<Stack.Navigator>
<Stack.Screen
options={({ navigation }) => {
return {
headerRight: () => (
<Pressable
onPress={() => navigation.navigate("Post")}
style={{
flexDirection: "row",
alignItems: "center",
padding: 10,
gap: 8,
}}
>
<Text>Post</Text>
<AntDesign name="arrowright" size={24} color="black" />
</Pressable>
),
};
}}
name="Home"
component={Home}
/>
<Stack.Screen name="Post" component={Post} />
</Stack.Navigator>
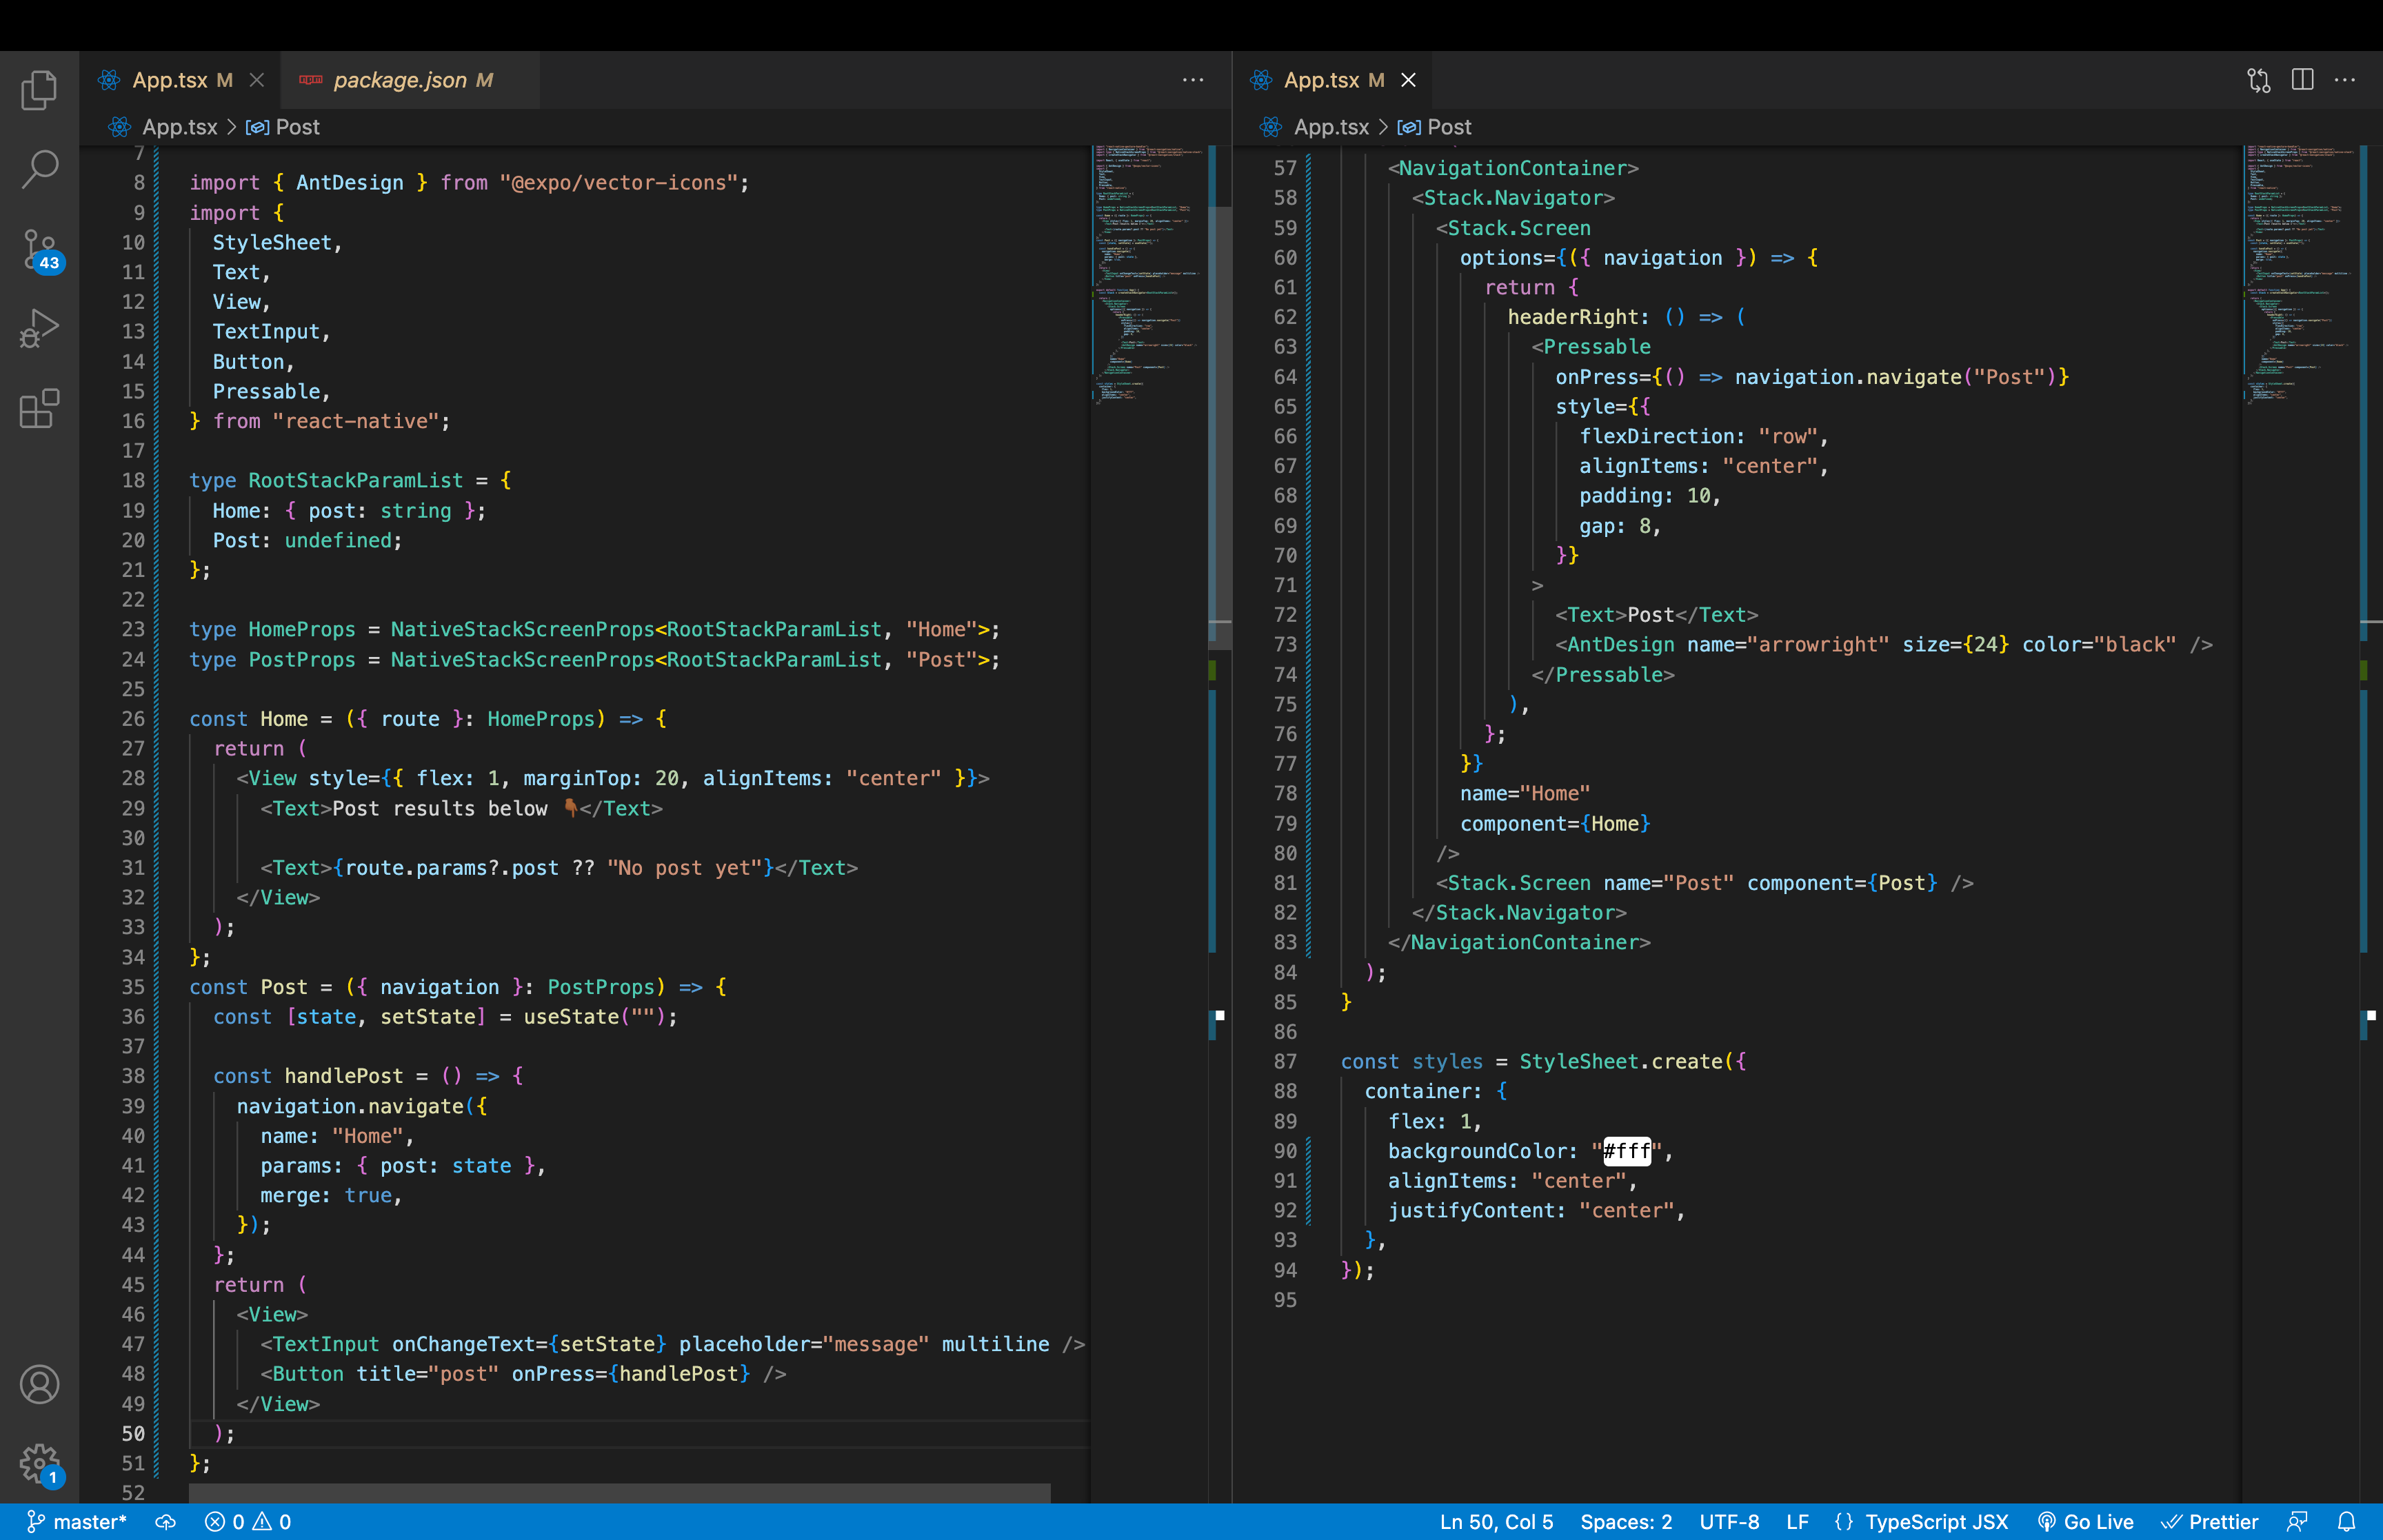
</NavigationContainer>Below is an example of what all this looks like in VS code.
note: In a production project, the components, types, and navigation would be in their own separate directories.
I hope you enjoyed this week’s newsletter and hope to see you next Thursday, or “Friday eve” as I like to call it. If you learned something, consider sharing this post to help support the newsletter.
Ways to support my newsletter
🖥 If you believe this content is valuable, share it on social media
🎤 If you believe I would be a good fit for a podcast, let your favorite podcaster know
Connect with me
Connect with me on LinkedIn!
Connect with me on Twitter!